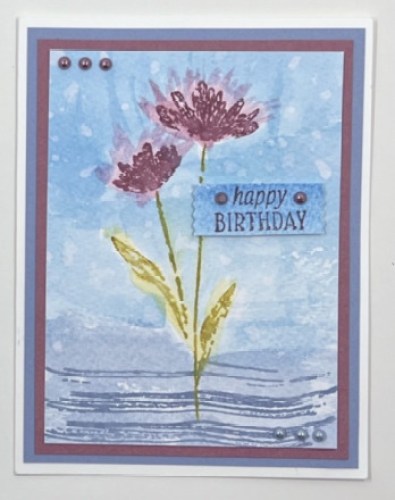
When Renee DeSchane sent me this card, I immediately asked her if she could teach me to make it.
We are all getting this lesson from Renee today. We are using the Inked & Tiled stamp set but feel free to use whatever you have and then come share your watercolor cards with us over in the Back Porch Stampers.
But first, a bit about Renee. Renee is on my Fine Line team of demonstrators and we go back many years. I call her my “over the top” stamper friend and Tim calls her the “overachiever”.
She loves to take an idea and put her own spin on it. She is known for making unique special cards for each friend or event.
After teaching classes in her home for many years, Renee is now taking an extended break while she remodels her stamping space. She does not have a facebook page or a blog – but many of us would love to see her start one!
Isn’t it fun that we get to do whatever we want with SU! when we buy the starter kit?
Supplies for Watercoloring Fun
Here are the supplies you will need. Notice that many of these have choices – we love to say “Use whatever you own”!
- Clear block or heavy sheet of acetate or silicone mat
- 3 ink pads or 3 ink refill bottles or 3 Stampin’ Write Markers (not Stampin’ Blends)
- Water Painters (from SU!) or a wide bristle brush & reg brush
- Watercolor Paper
- Stamp Set (We are using the Inked & Tiled stamp set)
- Glass/cup of water
- Heat gun or hair dryer or patience to let it dry on it own (use in between layers of adding color)
- Paper Towels and Wet Wipes
Basic Watercoloring
Stamp your image on watercolor paper. With a stamp like this one, you can use ink pads or markers to color.
Add a drop of ink refill or scribble a marker or dab a stamp pad on a corner of the acrylic block.
Use a water painter (dipped in water) or paint brush to add water to the color. Mix it around and color around the flower.
Repeat with a second color for the rest of the card front.
Flicking Technique for Watercolored Cards
Use the fine tip water painter or brush to “flick” the color from the flower out beyond.
Add more ink with a marker if desired.
Add the lines stamp across the lower part of the card and swipe the water painter or brush across the lines to fade them out.
Faux Bleaching Technique for Watercolored Cards
Notice the white spots scattered across the background. These are made by “flicking” the wet painter or brush right over the card.
More Watercolored Cards
Change the colors of ink and change the feel of the cards. Here are two more variations of this card.
And this card that Renee created too? She shares how to make this background in the video below.
For this episode of Create with Us Live Show with Karen & Tim, I got to play Tim’s role as the student following along and making a card. That was so much fun to do!
A huge thank you to Renee DeSchane for this tutorial. If you have any messages for her, just add them here in the comments.
Watercoloring Cards Made Easy with Renee DeSchane
Be sure to watch us each Thursday at 1 pm central as we bring you fun card ideas for us to create together.
Subscribe to our Youtube Channel here.


Leave a Reply