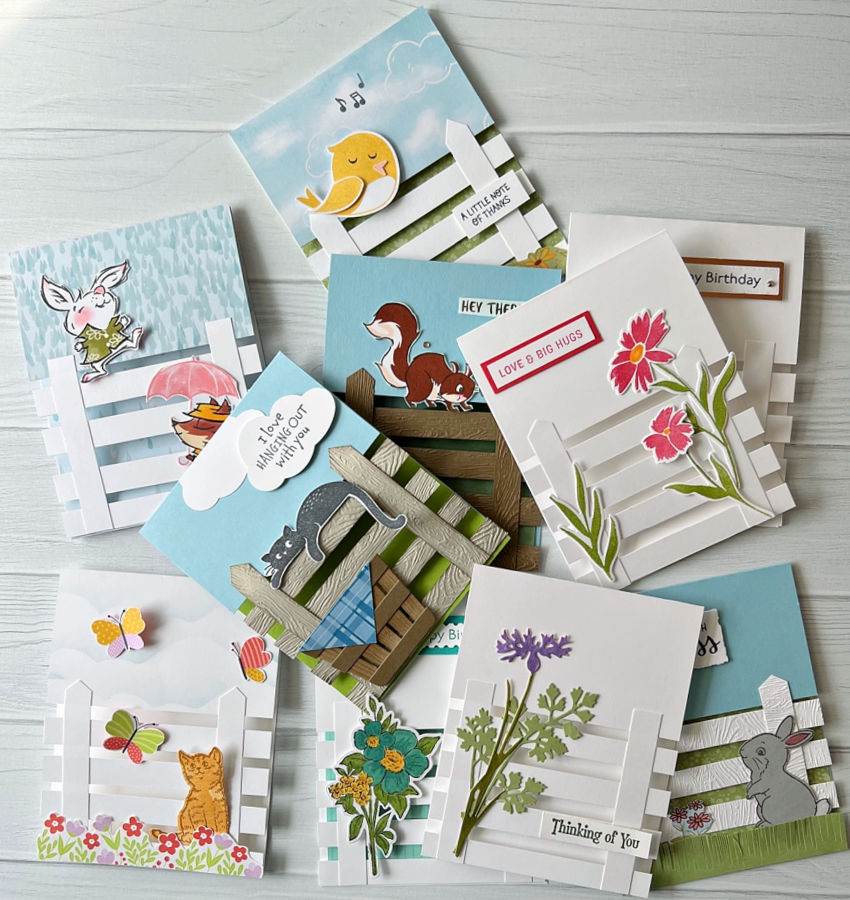
Looking for a unique way to make cards for your family and friends? These fence cards, or lattice split cards are perfect.
Add colorful flowers, adorable animals, butterflies or anything else you can think of to personalize it.
. 
Split Card Front Tutorial
These are the step by step instructions on how to make this fence card but be sure to keep reading to see how to change it up with a variety of techniques.
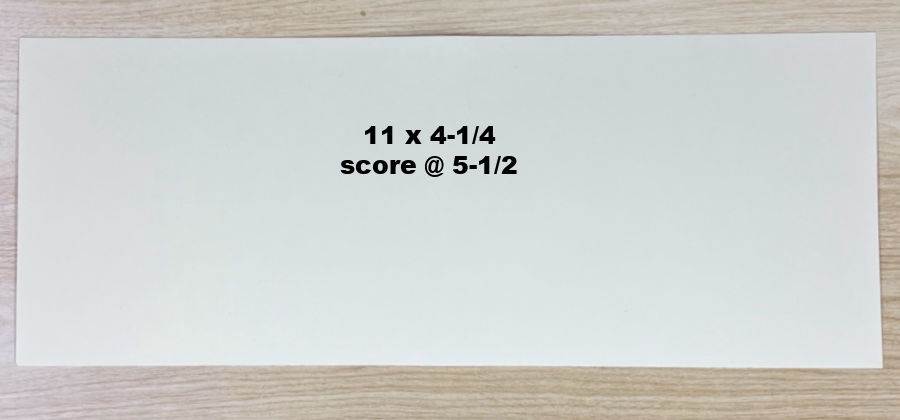
Start with an 11″ x 4-1/4″ piece of Thick Basic White cardstock, scored @ 5-1/2″ and folded.
Cut six 1/2″ strips off from the bottom of the card front like this.

Attach masking tape (or washi tape or sticky notes) to the underside of the card front with the sticky side up.

Set two of the paper strips aside.
Lay one of the four strips across the bottom of the card front, lining it up along the bottom edge.

Add the other three strips, leaving spaces in between.

Add small drops of glue along the two sides of the card for the fence posts.

Add the fence posts and let the card dry. Then carefully removed the masking tape and trim the edges of the posts.

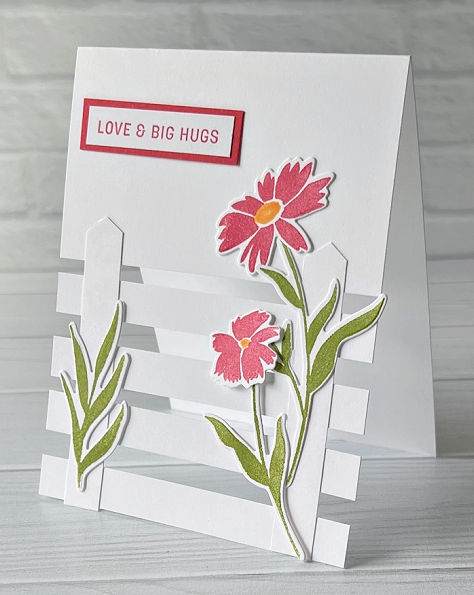
On to decorating!
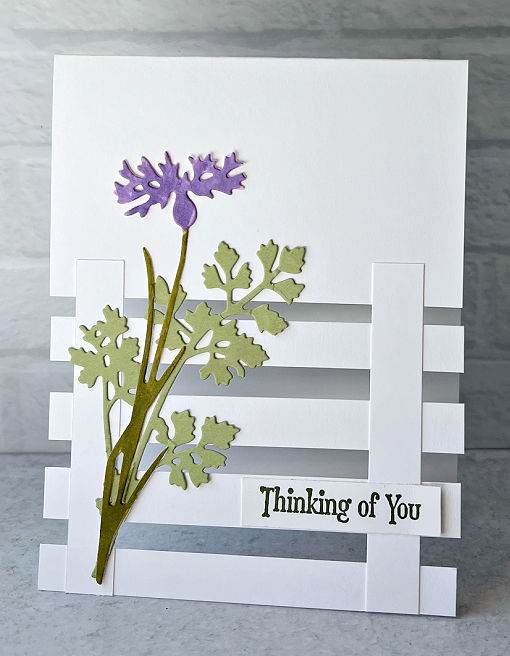
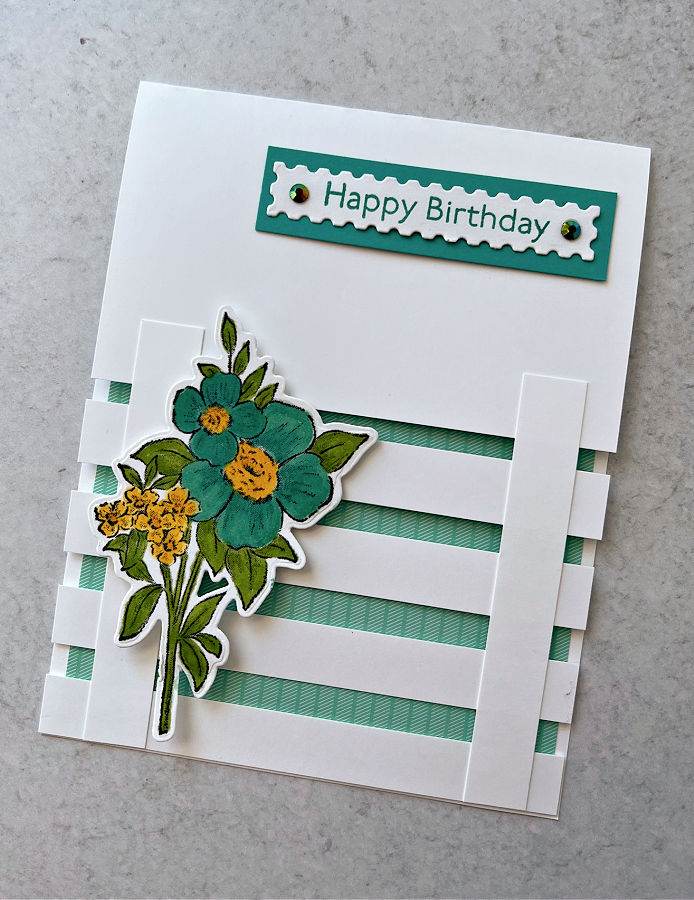
Here are two more flower cards, using the same white background.
 .
. 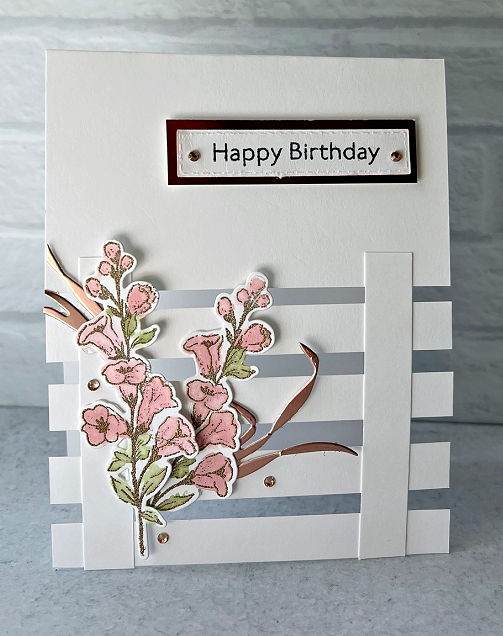
Adding an additional piece of cardstock or Designer Series Paper to the inside of the card creates a different look on the front.
Stepping Up Your Lattice Fence Cards
All of these techniques are demonstrated in the video below.
Cut your own mask for the clouds and use a sponge dauber and ink pad to create the clouds background.
The kitten has been stamped on Designer Series Paper and then cut out – so it is not colored in.
And the flower garden in the front? Just fussy cut from the Butterfly Kisses Designer Series Paper along with the butterflies.
Notice how the tops of the two posts have been cut.

Adding layers of Designer Series Paper on the card front and inside creates a fun look.
The inside piece measures 4-1/4″ x 5-1/2″ and the front piece measures 4-1/4″ x 2-1/2″. Attach these before making the fence.
The Rain or Shine Designer Series Paper is featured in both of these cards. The cute animals are fussy cut from that.
The bird is made with the Sweet Songbirds Bundle.


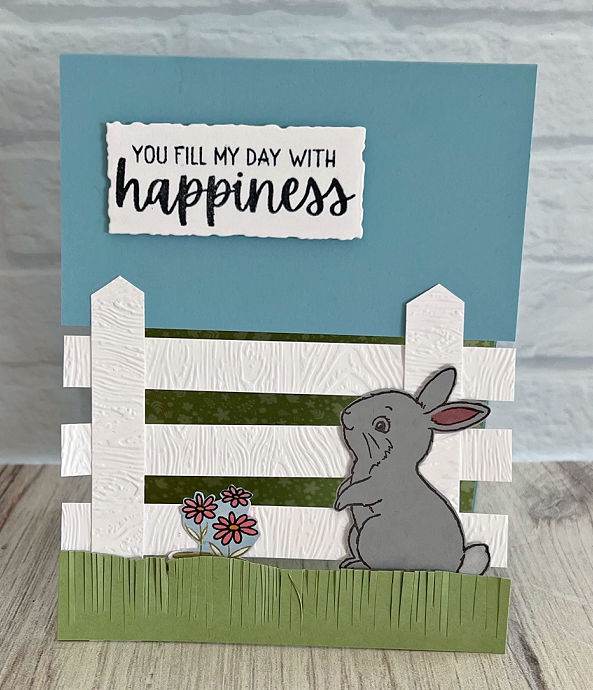
Creating the Woodgrain Fence for the Lattice Card
Another way to step up these cards is to make the fence look like wood with the Timber 3D embossing folder.
This adorable bunny card has a white picket fence and the squirrel card has a brown fence.
 .
. 
Sponging the edges of the fence pieces gives a wonderful aged look to the fence.
The sentiment on this card has been stamped on a cloud (made with the Cloud Punch.)
The black cat (from the Love Cats) lounging on the fence over the basket (Cheerful Basket Bundle) makes a delightful card.

How to Make Easy Lattice Cards
This is a replay of our weekly live show so go to 15:39
Whether you prefer the elegance of the white on white lattice cards – or the fun of stepping them up – you will find many more cards like this over the Back Porch Stampers! You are invited to share your cards there too!

What do you do about the split fence cards when you add objects that enter inbetween the railings of the fence? Mine show through on the back of the card.